
Docs
How to add an app to the exclusions list
Add an app to the exclusions list when you want TypeSwitcher to leave text in that app untouched. Auto-correction pauses only while the excluded app is active and continues everywhere else.
Quickly exclude the current app from the menu
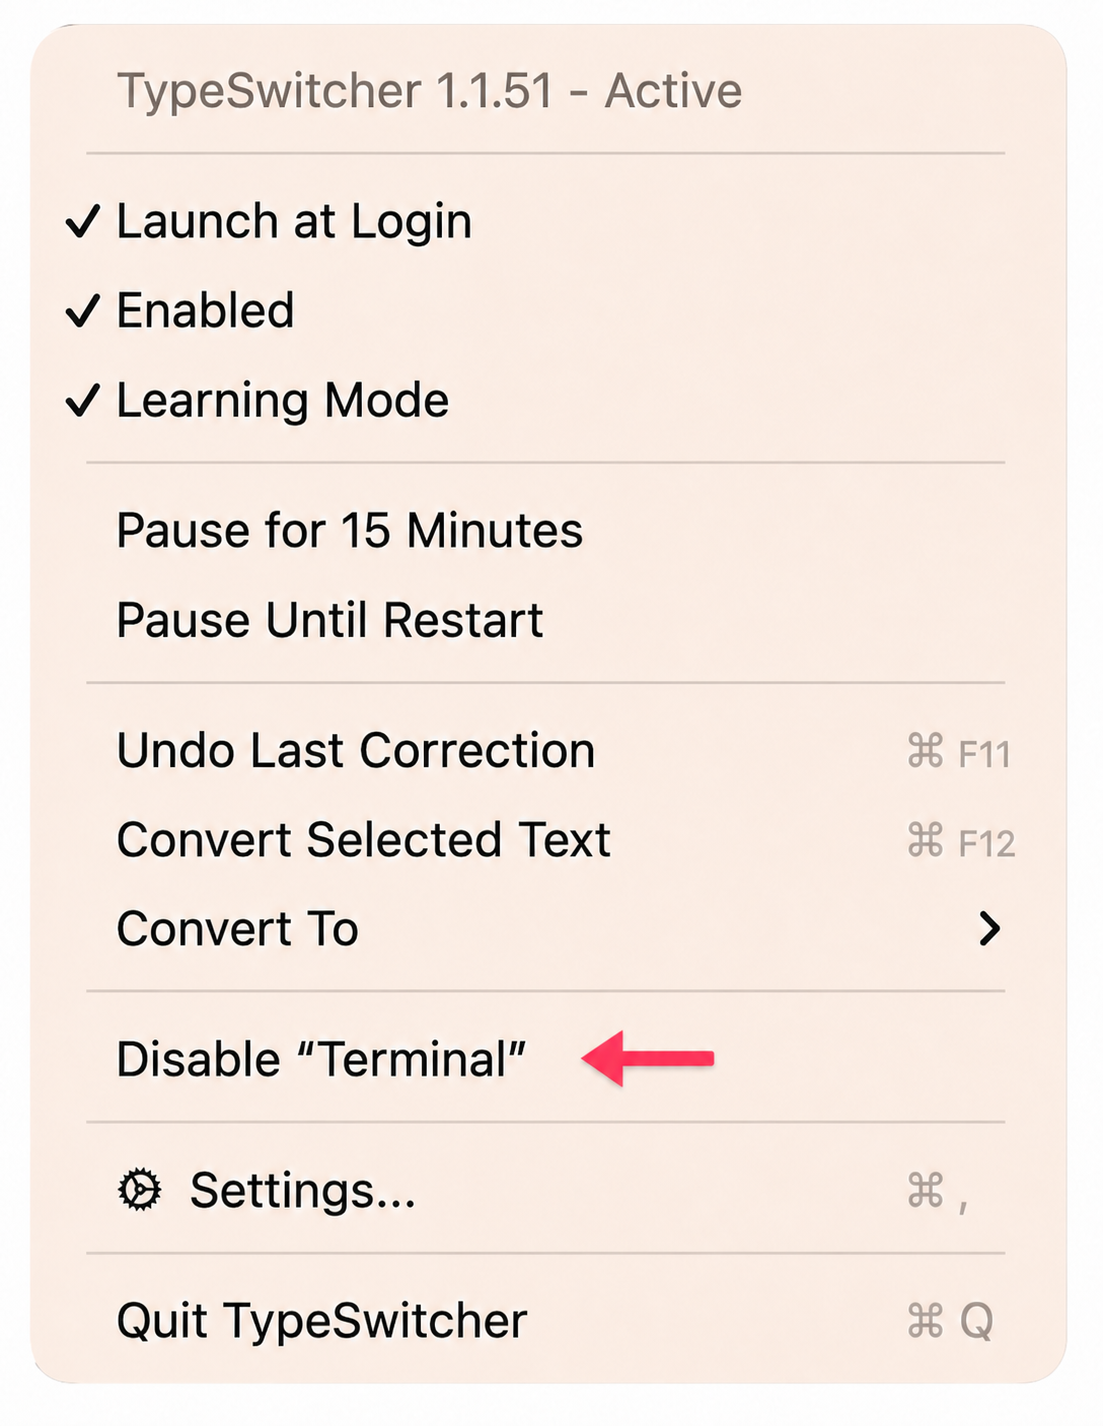
The same option is available directly in the TypeSwitcher menu, so you do not have to open Settings. The menu automatically shows the four most recently launched apps, making it easy to select the one you want to exclude.
- Switch to the app you want to exclude and make it active.
- Open the TypeSwitcher menu from the menu bar or system tray.
- Choose Disable “App Name” — for example, Disable “Terminal”.
- The app is added to Excluded Apps immediately.
Add an app in Settings
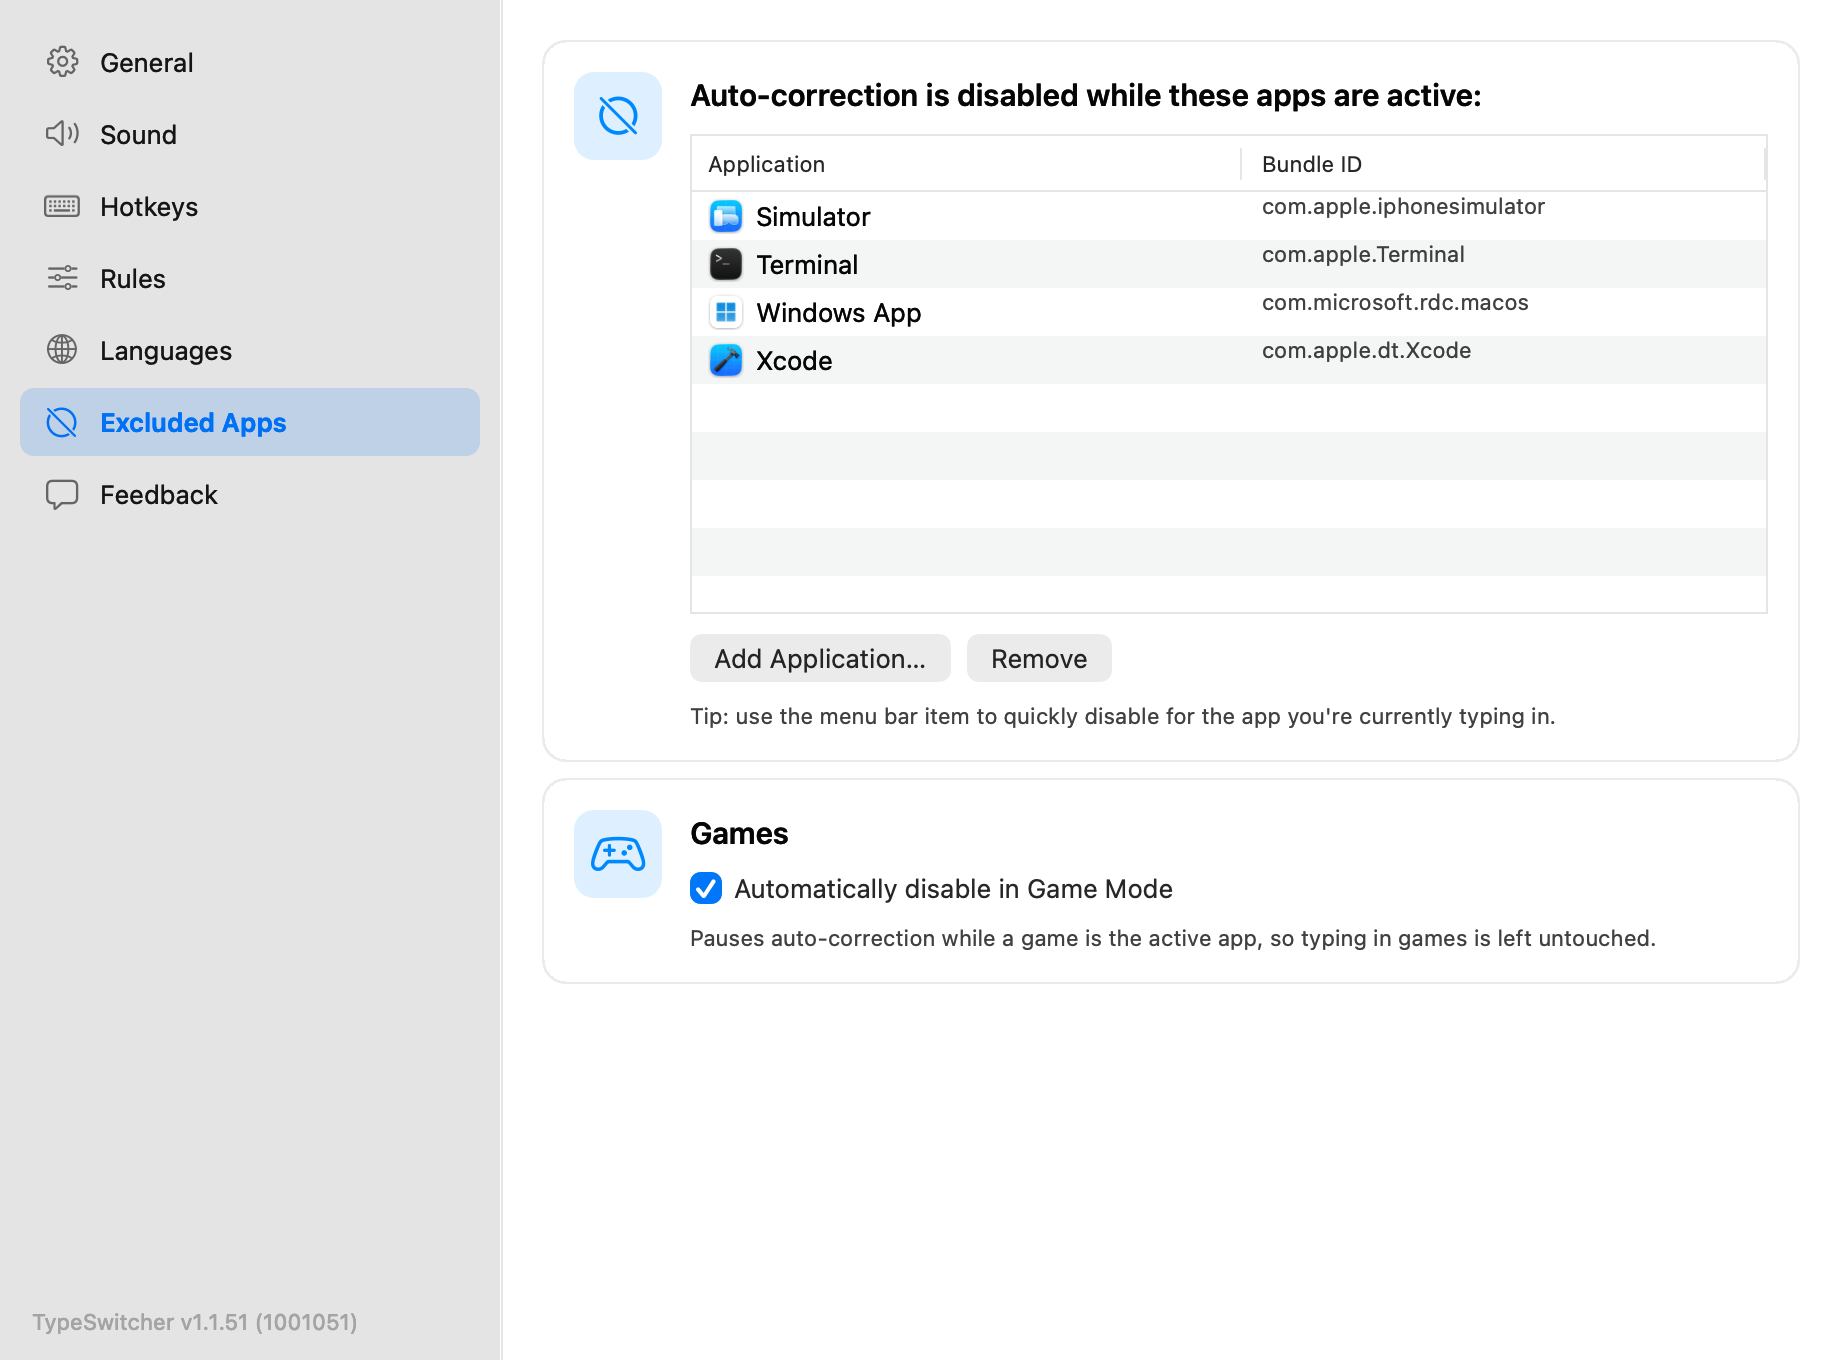
Use the full list in Settings when you want to add a specific app or review existing exclusions.
- Open the TypeSwitcher menu from the macOS menu bar or the Windows system tray, then choose Settings.
- Select Excluded Apps.
- Click Add Application… and choose the app you want to exclude.
- The app appears in the list and the change takes effect immediately.
Turn correction back on for an app
Open the TypeSwitcher menu and choose Enable “App Name”, or open Settings → Excluded Apps, select the app and click Remove.